Friday, January 31, 2014

Hodge Podge Calypso


I see so many cards that use numerous designer paper our of the same package.  They always look so cool.  Do you think this is too busy?  I love this paper set and I know I will not only use the whole pack but have to order more before the catalog retires next spring.  Which is not something I usually do.


Details:
Stamps: Blooming with Kindness, Papillon Potpouri
Paper: Calypso Coral, Epic Day This and That DSP, Daffodil Delight, Whisper White, Pool Party
Ink: Dafffodil Delight, Calypso Coral
Accessories: Big Shot, Labels Collection Framelits, Adorning Accents Edgelits, Bitty Butterfly Punch

Photobucket

Wednesday, January 29, 2014

Framelit Storage


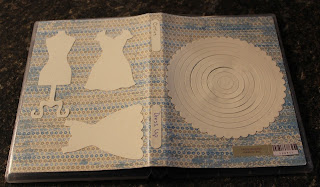
So when you order the framelits they come in little envelopes with a piece of back to back tape holding them unto a piece of cardboard.  I knew that was not going to work for me, so I went a searching.  I read that some ladies were storing them in the Clear mount cases that we could buy in sets of 4. I added a piece of magnetic sheeting to the inside and slapped in the Framelits.  I had stocked up on the magnets when SU sold them but I know you can get them at various craft stores and I hear even the Dollar stores.  I decorated the outside by cutting a retired piece of DSP, cuttin out each of the Framelit enclosed.  I wrote what was in the case and punched it out with the Word Window punch for the binding. I tried to put the UPC section with the name etc on the case too but I see I missed it on the Dress Up set....off to find where I may have placed it! 


Photobucket

Monday, January 27, 2014

Mosiac Madness


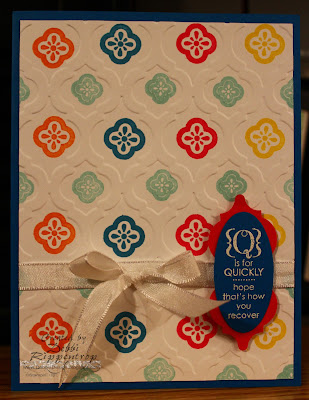
This card started out as a case from the catalog.  I am not one to do busy bright cards, but this one kind of took over.  I do not know how I survived without my Occasions Alphabet.  It has everything I need and there are are so many ways to layers it.  Once again...dimensionals (you should see my supply box lol)

Details:
Stamps: Mosaic Madness, Occasions Alphabet
Paper: Pacific Point, Very Vanilla, Melon Mambo
Ink: Pumpkin Pie, Pacific Point, Melon Mambo, Daffodil Delight, Soft Sky, Versamark
Accessories: Big Shot, Modern Mosaic Embossing Folder, Oval Punch, Mosaic Punch, Whisper White Embossing Powder, Whisper White 3/8" Taffeta Ribbon

Photobucket

Friday, January 24, 2014

Piano


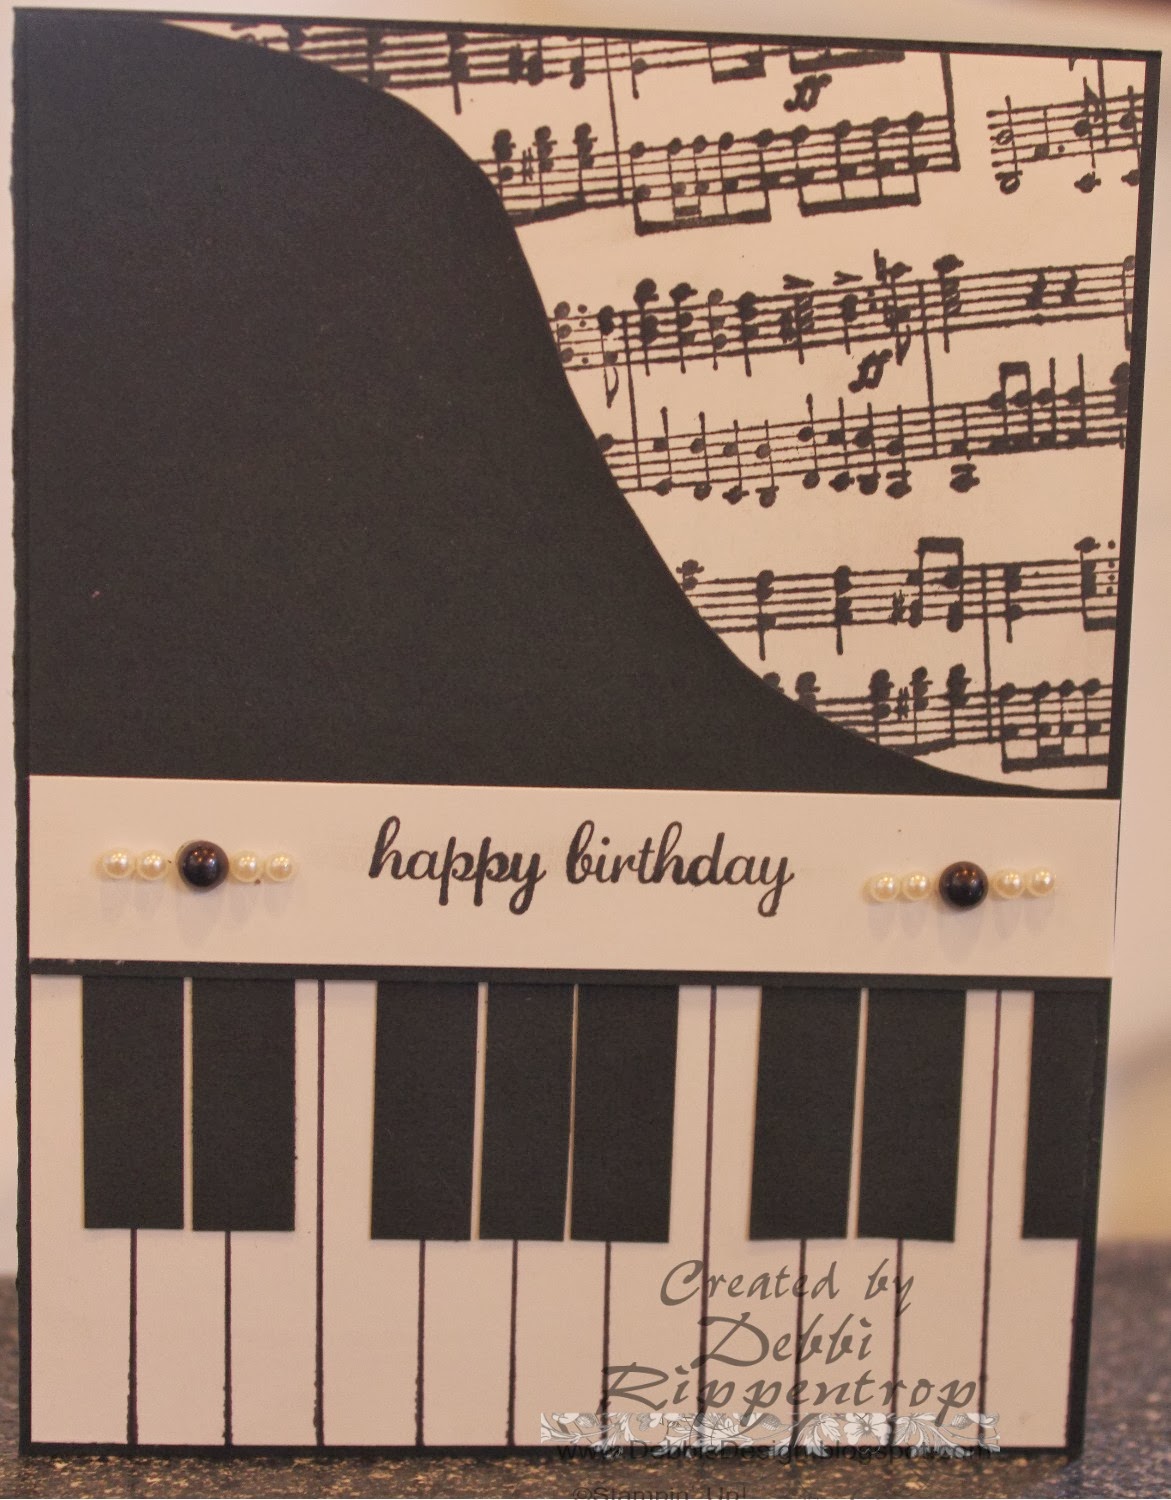
I have wanted to do one of these piano cards for so long.  It was sooo much easier than I had anticipated.  I know I will be making new variations often and soon.  I have lots of friends who love music so this will be a great go to design.  The music and the white keys are one sheet of card stock.  I drew the lines for the white keys with my Basic Black marker but I think next time I will cut them and mount on Basic Black card stock.  The top of the piano I did hand cut...never very good at that.  The larger pearl I colored with a black sharpie marker. I just made very sure it was dry before putting it on the Whisper White card stock.


Details:
Stamps: Express Yourself (Hostess Set), Music Notes Wheel
Paper: Whisper White, Basic Black
Paper Size: A2 4.25" x 5.5"
Ink: Basic Black
Accessories: Basic Pearls


Photobucket

Wednesday, January 22, 2014

With Sympathy


My husband often requests cards for work situations.  Unfortunately one of the most requested is sympathy cards.  These cards must be full size, the base being a full sheet of card stock folded in half.  That way many people can sign.  This one I kept pretty simple.  I sprayed the Doily with reinker/water combo in the Stampin' Spritzer. I love this look, vintage. The sentiment and the image are both embossed.  I wanted something simple in the big open area below and I thought the pearls filled just that void.


Details:
Stamps: Apothecary Art, Loving Thoughts
Paper: Early Espresso Coredinations, Very Vanilla, Crumb Cake
Paper Size: 8.5" x 5.5"
Ink: Versamark
Accessories: Big Shot, Stripes Embossing Folder, Labels Collection Framelit,  Basic Pearl Jewels, Tea Lace Paper Doilies. Early Espresso Embossing Ink

Photobucket

Monday, January 20, 2014

Trees


Well, I looked it up when I got this set out.  I bought it in 2001.  So I have had it for just about 12 years and it is still a very popular set.  Here I embossed the image in black and sponged some color here and there.  I ran the thin edge of the marker along one side of each tree to bring the brown together.  Since Early Espresso came out I have made that my go to brown.  I need to place an order and decided to spare my EE and go back to using more Chocolate Chip.  It still works just fine ;-)


Details:


Stamps: Lovely as a Tree
Paper: Chocolate Chip, Wild Wasabi, Very Vanilla
Paper Size: A2 4.25" x 5.5"
Ink: Chocolate Chip, Versamark
Accessories: Linen Thread, Black Embossing Powder, Big Shot, Wood Grain Embossing Powder, Artisan Label Punch

Have you checked out my Wacky Wednesday deal???

Photobucket

Friday, January 17, 2014

Heart Medley


I folded the front in half and cut out part of the heart, folded it back and glued the DSP on the inside of the card, the back of the heart and the front of the heart.

Details:
Stamps: Papillon Potpouri, Flower Shop. Itty Bitty Banners
Paper: Modern Medley DSP, Very Vanilla, Wisteria Wonder
Ink: Wisteria Wonder
Accessories: Bitty Butterfly Punch, Pansy Punch, Big Shot, Hearts Collection Framelit

Photobucket

Wednesday, January 15, 2014

Love Sketch


I didn't have more than 25 minutes this afternoon but I desperately wanted to do this sketch.  As you can see I left my laptop elsewhere as I ran to my office to make it.  That explains why I flipped the sketch sideways. lol  The hearts and the sentiment is popped up on dimensionals.  One of the hearts is doubled.  So, no stamping, no sponging, very simple and quick.


Details:
Stamps: None
Paper: Crumb Cake, Modern Medley, Red Glimmer Paper, Very Vanilla
Paper Size: A2 4.25" x 5.5"
Ink: None
Accessories: Big Shot, Pretty Print Embossing Folder, Hearts A Flutter Framelit, Label Card Framelit, Small Heart Punch, Chevron Punch


Photobucket

Tiny Punches


So today I thought I would share with you a fun little thing I ran across by accident.  I bought one of those sticky pads for keeping my phone in place on my dash.  One day I had to wash it (it had gotten dusty) and I set it on my desk to dry.  I love my punches but the little ones were constantly tipping over every time I went to use them or even bumped them.  So I lined them up on the sticky pad.  They stay in place and are easy to get just the one I need.  


Photobucket

Monday, January 13, 2014

Flipped Mosiac


I could do flowers and butterflies on every card.  Living in WI, especially today while I am setting up this post and it is -12° below (-30° with wind chill) I look forward to spring.  These flip cards are soo fun and easy with the dies.  I go through quite a few Thinking of you/ Thank you/ Praying for you cards.  They make great secret sister gifts too.


Details:
Stamps: Blessings from Heaven, Flower Shop, Papillon Potpouri
Paper: Strawberry Slush, Crisp Cantaloupe, Baked Brown Sugar, Coastal Cabana, Whisper White, 
Ink: Baked Brown Sugar
Accessories: Big Shot, Modern Mosaic Embossing Folder, Punch Pack Punches, Pansy Punch, Bird Builder Punch, Bitty Butterfly Punch, Label Card Thinlets Die

Photobucket

Friday, January 10, 2014

Cut Out Front

Somehow this one did not get posted before Christmas.  This was actually my 11 yr old Daughter's idea.  See wanted a card were the inside was the main image to go to the front.  I did cut the front first and then stamped the image through the opening.  I used my stamp a ma jig to stamp the image again with the Heat and Stick powder and dumped Dazzling Diamonds over it all.

My DD ran the Versa Marker over the edge of the trim and used the Heat/Stick, Dazzling Diamonds there too.
The star was a punch that carried over but did not carry over as long as I thought it would....

Details:
Stamps: O Holy Night
Paper: Midnight Muse, Crumb Cake, Early Espresso Core-dinations
Ink: Midnight Muse
Accessories: Heat & Stick Powder, Dazzling Diamonds, Big Shot, Beautifully Baroque Embossing Folder, Labels Collections Framelit, Adorning Accent Edglit, Adorning Accent Embossing Edge, Star punch

Photobucket

Wednesday, January 08, 2014

Vintage Sketch


Well, I am a week behind on my Sketch Challenges.  I was able to have a friend over last Wednesday to make some cards and I did the Sketch Challenge.  I just have not had time in the last week to post it....so I decided just to be a week late, maybe I will have time later today to get to today's challenge.


I sprayed the doily with Crumb Cake re-inker and water that I keep in my Stampin Spritzer (pg 164). I stamped the butterflies after cutting them out and sponged around the edges.  I glued the DSP to the Soft Suede before I ran it through the Big Shot.  I left the upper corner unglued to make it easier to curl down after. To adhere the butterflies I just put a few dots of Mono adhesive on the back.  I have done this numerous times and have never had one come off, in fact I have tried to move some and they will tear if removed.  The sentiment is popped up on a Dimensional.


Hope you are all warm and safe!


Details:
Stamps: Oh Hello, A Round Array
Paper: Afternoon Picnic DSP, Pear Pizzazz, Soft Suede, Very Vanilla, Wisteria Wonder
Paper Size: A2 4.25" x 5.5"
Ink: Soft Suede, Wisteria Wonder
Accessories: Tea Lace Doilies, Big Shot, Bitty Butterfly Punch, 7/8" Scallop Circle Punch, 1" Circle Punch, Beautiful Butterfly Die, Rhinestones, Bird Builder Punch, Perfect Polka Dots Embossing Folder

Photobucket

Monday, January 06, 2014

2013 Christmas Card

Sorry, it has been so long since I posted.  I thought I had built up enough to last me through the Christmas break, but apparently I did not have them finished so you will see some of them later.  I had some major vinyl orders to fill and not much time to stamp for my own. I very much appreciated the orders and the extra income for Christmas!


This was the Christmas card we sent out this year.  I decided to go with a TriStep Card this year.   I love the vintage silhouette look and decided that would be my design.


I love to add a bit of pizzazz so the glimmer paper did just that.  I used my Sizziz Eclips to cut out my images and add shadowed images where I wanted them.  I was able to size them exactly as I wanted them for each layer in my computer program.  


You can adjust your dimensions to work for you.  I knew I wanted to use the O Holy Night stamp so I made sure my cuts fit.  I printed our names because there is no way I can sign over 100 cards.  My left side would not be usable for weeks if I had done that. :-)


Here is the measurements that I used for this card.  As I said they can be adjusted to fit whatever design you have in mind.  The solid lines are where I cut and the dashed lines are score lines.  So in this case I scored at 1", 2", 3-1/4", 4-1/2", & 6-1/2". The half way score for the fold on the main panel will be at 4-1/4".

If you have any questions please either e-mail me or leave a comment and I will get back to you as soon as I can.


I only had a few minutes to throw together a picture so I could get it picked up and in the mail.  I procrastinated big time about getting the picture taken and had 45 min to put this together and sent to have it printed so they would be ready to pick up when I got to town.  The joys of living 30 minutes from any store....Since my cards fold to be 5-1/2" x 4-1/4" and printed pictures come in 4" x 6"  I design in the 4" x 6" in MDS (My Digital Studio).  I used to just leave the excess area that I was going to cut off (so they would fit in the envelope) blank.  I had so many issues with printers expanding them to fill in the white.  So I started designing the cut off section.  I still just cut it off and throw it away but no more issues with the printer place changing the size or design.


Details:
Stamps: O Holy Night
Paper: Basic Black, Very Vanilla, Silver Glimmer
Paper Size: A2 4.25" x 5.5"
Ink: Basic Gray
Accessories: Big Shot, Pretty Print  Embossing Folder, Sizzix Eclips, Pictures-MDS

Photobucket
Related Posts with Thumbnails