Wednesday, April 30, 2008

Sketch Flower


Today was the Sketch Challenge. I love the fact that I can use this to start a card. I think it makes it so much easier to have a sketch started. I love to look at the gallery to see how other people interpreted the sketch. it can go in so many directions. The flower was embossed with Perfect plumb and then colored in with re-inkers and the aquapens. I went sloppy since I was cutting it out I did not have to stay in the lines. I then just added some more e\ink tot he spots I wanted to shade. I used the gel pen to make the dots around the edge of the large oval. The ovals I cut out with Coluzzle. I just curled the flower on my fingers after I cut it out. I'm trying to use sets that have been put away for awhile. We have had no snow for a few days so here comes the flowers again! I sponged Pale Plum around the edge of the Whisper White oval and White Craft around the edge of the Perfect Plum oval.

Card details to be posted very soon

Tuesday, April 29, 2008

WOW Surprise ~ Thank You!!!


What a great day yesterday turned out to be. I've been going through quite a bit of stress lately (making some big life decisions) and many migraines. I know God is in control and I am seeking his will in these decisions. I got this surprise package in the mail yesterday! The only thing that was on the outside of the box was that is was from a SCS RAK (random act of kindness). I can tell it was from Ohio but that is it, so I do not know who to formally thank. So whoever you may be THANK YOU!! It was a great blessing to receive such a generous box of goodies and I really appreciate your thoughtfulness. I cannot wait to use these wonderful, fun items. You touched my heart! If it was you please post, PM or e-mail me, I would love to thank you personally!

Edited to add that my friend Sue sent me this wonderful package! Such a dear and thoughtful on-line stamping friend!

Sky Blocks


Today was the Color Challenge. The colors were Soft Sky, Purely Pomegranate and Basic Black. I used the 1 1/4" square punch to make my blocks. I love the new Tombo-multi glue. The wide applicator made putting the blocks down so much easier than the other adhesives I used. It was easy to put all over without too much. Just remember to put it where you want it the first time because it sticks!!! I could not decide which color to go with behind the sentiment so I just used both of them. I just kept thinking it needed just a little more and could not figure out what it was. That is were the piercing comes in again. I colored the image with re-inkers and the aqua painters. Just clarify....I glued down all of the squares before I stamped my image.

Stamps: Summer by the Sea
Paper: Purley Pomegranate, Soft Sky, Soft Sky Print Patterns, Basic Black
Ink: Black Craft Ink, Purely Pomegranate reinkers to color
Accessories: Photo Corner Punch, Circle Ice Rhinestone Brads, 1 1/4" Square Punch, Mat pack for Piercing, 1 3/8" Circle Punch, Designer Lable Punch, Sitched Purley Pomegrante Ribbon, Black Brads

Monday, April 28, 2008

2 Fold Card


Today's Challenge was the Technique challenge. The challenge was to make a two way open card. Once again I got my colors from the outfit I wore to church on Sunday. Maybe I should make that a personal challenge for my Monday's ;). I added dazzle to the scallop punch with versamark and Iredescent Ice embossing powder. The sentiment was done with craft ink and clear embossing powder. Well, my morning went far to fast today. It was probably because this snow just will not stop! I hope you all have a fun and productive day!!

Stamps: Sanded Background, Doodle This, Circle of Friendship
Paper: Kraft, Really Rust, Garden Green, Bravo Burgundy
Ink: Really Rust craft and classic, Bravo Burgundy, Garden green craft and classic, Versamark
Accessories: Mat pack for piercing, Crop-a-dile, Jumbo Eyelets, Vintage brad, Ticket Corner punch, Slot punch, Scallop Circle punch, 1" circle punch, 1 3/8" Circle punch, 1 1/4" Circle Punch, Iridescent Ice embossing powder

Friday, April 25, 2008

Scrappy Blossom


So today in the Limited Supplies Challenge you could only use scraps. Here is what it was suppose to be like.:
The List
1. Make a square card. (Any size)
2. Use only scrap pieces of paper. (The base card doesn't have to be a scrap.)
3. Use ribbon or fiber scraps.
4. Use only ONE other embellishment.
5. Use any colors, stamps, and tools.

Since I just now re-read the rules I see I messed up. I did not do a square card. The phone has been ringing off the hook, my IM's have been nuts this morning and the kids really wanted to get school done fast today. So my mind just was not where I thought it was. So this card will not be posted with the challenge since I definitely do not have any more time to stamp today. I have to take my son to band and then get supper ready.....I now see I forgot to put my faux brads in the corners of the card. They are sitting quietly on my desk (that would be the only quiet thing in my house today).
Stamps: Wonderful Words
Paper: Bali Breeze DSP, Groovy Guava, Taken with Teals, Always Artichoke, Mellow Moss
Ink: Always Artichoke
Accessories: Frayed Ribbon-Tempting Turquoise, Groovy Guava Stitched, Build a Brad, Scallop Circle Punch, 1/8" Circle Punch, 1" Circle Punch, 3/4" Circle Punch, 1/2 Circle Punch, 1/4" Circle Punch


Have A Great Weekend!!

Thursday, April 24, 2008

Scored Ship


Today's Ways to Use it Challenge was to snip snip. We had to use our scissors for more than cutting ribbon. So I decided to cut out an image. I needed some masculine cards so I grabbed for my faithful Winds of Grace. I cut my Not Quite Navy scrap and noticed it had a score across it, so I decided that the background would have a score pattern. I used somewhat of yesterday's sketch. Once I did the scoring I did not want to cover it up with another layer so I left it as it was. I used my Mat Pack template to mark the holes for the brads. I hardly ever use my colored brads so this was a big step for my hoarding to use 10 of one color... I stamped the ship in Mellow Moss and then colored over the areas with a markers that I wanted different. The ship and the sentiment are popped up with glue dots. Yes....I used Chocolate Chip again today!

Stamps: Winds of Grace, Sanded Background, Circle of Friendship
Paper: Chocolate Chip, Always Artichoke, Not Quite Navy, Mellow Moss, Very Vanilla
Ink: Always Artichoke, Chocolate Chip, Not Quite Navy
Accessories: Always Artichoke Brads, Mat Pack for Piercing, Paper Scissors, 1" Circle Punch, 1 1/4" Circle Punch, Scorer Blade

Wednesday, April 23, 2008

Sketch Blossom


This was for today's Sketch Challenge. This one I just did step by step. I thought I wanted to use a designer paper in the back layer, so I grabbed those. Once I decided what paper I was going to use I knew what colors I wanted to use. I guess I am in a chocolate mood this week. Not for chocolate itself since I am allergic, just the color :) The flower and leaves are the same ink I just stamped once off on a piece of scratch paper to get one to be a lighter shade. I stamped the vine in the Wild Wasabi and just went over the branch part with the Chocolate Chip marker. I used the Groovy Guava textured cardstock to give it just a little more.

Stamps: Blosom Abound
Paper: Chocolate Chip, Wild Wasabi , Afternoon Tea DSP, Groovy Guava Textured, Very Vanilla
Ink: Groovy Guava, Wild Wasabi, Chocolate Chip
Accessories: Vintage Brads, Wild Wasabi Stitched Ribbon, Groovy Guava Stitched Ribbon, Wide Chocolate Chip Grosgrain Ribbon

Tuesday, April 22, 2008

Another Case

So today for the color challenge I grabbed the catalog again. I opened to page 108 and thought that the design there would go with the color challenge. The colors today were Chocolate Chip, Pretty in Pink and Certainly Celery. I went with the chocolate as the base so I could use the poly -twill again. I used the celery as the bottom as I know I had that in the print pattern paper. I used the cutter kit to get my wave. I do need to practice that but I only had one sheet left of the floral celery and I guess I had too much confidence in myself to get it right the first time... I'm still working on getting the rub-ons down but I know I will order them again! I sponged around the edges of the flowers and the celery paper with chocolate chip. I did not use any stamps for this card at all.

Stamps: none
Paper: Certainly Celery Prints DSP, Chocolate Chip, Pretty in Pink
Ink:Chocolate Chip to sponge around the edges
Accessories: Eastern Elegance Rub-Ons, Chocolate Poly-Twill Ribbon, Cutter Kit, Scallop Circle Punch, Boho Blossoms, 1 3/8" Circle Punch, 1/2" Circle Punch, half pearl from the pretties kit

Monday, April 21, 2008

Page 36 Case


Well, today I squeezed in some time to stamp. I needed a little push to get started. I checked out the challenges for today and they just did not appeal to me. So I randomly opened the catalog and took a color combo and a layout. My catalog opened to page 36. I did very few changes. I swapped out the stamp set for one that I had. It made it easier to actually make the card ;). Since my image was a bit smaller I did some piercing along the top. I moved the brads to the bottom and made it 3 since that matched the piercing pattern at the top. I use the piercing template to make sure my brads are straight. I did brush around the edges with Chocolate chip. The flower image is clear embossed over Chocolate chip craft ink. The butterfly is on a pop up glue dot. I wanted to use the poly-twill ribbon from the mini. I could not decide which color to use. Since they both fit, I used them both. :) I do not know why I do not just grab the catalog more often for inspiration...

Stamps: Essence of Love
Paper: Kraft, Old Olive, Chocolate Chip
Ink: Craft- Chocolate Chip
Accessories: Mat pack for Piecing, 1" circle punch, Old Olive Button, Cutter kit for distressing, Clear Embossing powder, Vintage Brads, Pop up glue Dot, Old Olive Poly-Twill, Chocolate Chip Poly-Twill

Friday, April 18, 2008

Bathroom Clock


Well, I did not get the time today that I had planned so I will post the picture of the clock that I made for my bathroom. I should of removed the cover to get a better picture....I used Craft ink and the 1,2,4,5 etc are done with the smaller flowers with the Sage Shadow. The are also stamped randomly in the flourish.
Stamps: Baroque Motiffs
Paper: Close to Cocoa
Ink: Craft- Handsome Hunter, Sage Shadow, Chocolate Chip
Accessories: $3 Wal-mart Clock

Tuesday, April 15, 2008

Excuse me

Sorry, but I am going to have to take this week off. I started re-modeling my bathroom last weekend and it is taking quite a bit more time than I anticipated. I can't wait to get it done! I did stamp a new clock for in there so if I find time I may try to get that posted yet this week. So for now... have a great week!

Friday, April 11, 2008

Blossom Sketch


Boy, was yesterday busy. I had a Stamp buffet and needed to get things set up, plus do school with the kids. By the time the ladies all left I was exhausted and had a migraine. So I slept in. By the time I got going this morning I was already behind... So after I got all my stuff put away from the night before, finished school and ran my errands I had very little time before dinner. So I jumped over to the Demo Planner challenge for April. You get a choice of 2 sketches and 3 color combos. You can also do a Simple and Sweet or a Workshop Wow. I went with the Simple and Sweet and kept it easy.
Have A Great Weekend!!
Stamps: En Francias Background, Blossoms Abound
Paper: Rose Red, Cameo Coral, Whisper White
Ink: Cameo Coral, Rose Red, Old Olive
Accessories: Mat pack for Piercing

Wednesday, April 09, 2008

Distressed Butterfly


Ok, when I saw this sketch last night I was a little concerned about how I would make this work. I started by figuring I wanted to use some designer paper. So off to my stash I went. I love the Afternoon Tea paper! I used my Coluzzle to cut my ovals. The scalloped one I just went around the outside edge with the corner rounder (guide removed). I used the mat kit to do the piercing. I pierced 3 and skipped 3 all the way around curving as I went. The outside layer is the same size just without the scallop cut away.

The background was first done with bleach and then I used the Close to Cocoa. I did not want the stamp on the bottom to over power the butterfly so I just used the top of the stamp on the bottom edge. The center butterfly has a rhinestone brad from the Pretties Kit and is popped up with a pop up glue dot that is cut in half. I used the rub-ons on the ribbon (another thing I've wanted try do off my list!). I did do some sponging around the Close to Cocoa Oval to give a little more dimension.

Stamps: Sanded Background, Essence of Love
Paper: Afternoon Teas DSP,Close to Cocoa, Groovy Guava,
Ink: Bleach, Close to Cocoa
Accessories: Eastern Elegance Rub-Ons, Pretties Kit, Wide Chocolate Chip Grosgrain, Coluzzle, Mat pack for Piercing, Corner Rounder for scallops, Pop up glue dot

Tuesday, April 08, 2008

Color Challenge

Boy, was the >Color Challenge today a doozee! The colors for today are Night of Navy, Real Red and Glorious Green. When I asked my kids what they thought of my card they all said it would be better if I had used different colors....Well, I think it turned out kind of Christmasy. We had some nice weather almost to the 70's. Now it is freezing cold again and suppose to snow today so I guess it fits. ;)

Stamps: Doodle This, Short & Sweet
Paper: Night of Navy, Real Red, Glorious Green, Whisper White
Ink: Night of Navy, Real Red, Glorious Green
Accessories: Photo Corner Punch, 5 Petal Flower Punch, Crimper, Silver Hodge Podge Hardware, Spritzer

Monday, April 07, 2008

Bronc Ribbons


So today was the Technique Challenge. The challenge was to Stack Your Ribbons. As I was blurfing (surfing blogs, for those who do not know the term) this weekend I saw a card that used the wide twill. I cannot remember whose blog it was on so if it was you, speak up! I have so much of it as I tend to just use the two other sizes. So this challenge fit perfect for one of the many things I need to use/do more often. Since I started with such large twill I decide that I would layer 3 different ribbon. as I was cleaning my room this weekend I found that my Old Olive Twill had fallen behind the ribbon containers. I just had to use it so that it where my color theme came from today. I also wanted to do more than just layer so that is how I came up with the idea to put the last layer through the Jumbo Eyelets.

I included the second picture because it was hard to see that I stamped the background twice. I stamped it the first time with the Basic brown and the second time with the Vanilla Craft ink. The main image I stamped in the Basic Brown, wiped off the parts I wanted Old olive with a tissue and colored those with the marker. I roughed the edges with the Cutter Kit. I also sponged around the edges of the outside Chocolate Chip with the Very Vanilla Craft ink. I also used the Naturals Ivory paper, which is another thing I forget I have.
Stamps: Bronc Buster, Short & Sweet, Sanded Background
Paper: Chocolate Chip, Old Olive, Naturals Ivory
Ink: Very Vanilla Craft Ink, Basic Brown, Old Olive Marker
Accessories: Cutter Kit, Large Oval, Small Oval, Jumbo Eyelets, Wide Twill, Wide Chocolate Chip Grosgrain, Old Olive Twill

Friday, April 04, 2008

Wasabi White


Here is another attempt for me to use the Pretties... Maybe I should just make myself use the Pretties kit every Friday. ;) This time I just decided to stamp on them. The Limited Supplies Challenge for the day was to only use two colors. The other color had to be white. So the first thing I did was check my ribbon, between the stitched and the stripped I had a lot of white combo choices. I had stamped the main image in Wasabi on White and it was just to much white. So then I decided to stamp the image on Glossy with Versamark ink, roll over it with my brayer and Wild Wasabi ink. It is hard to tell but I stamped the Stitched background over the designer paper in Wild Wasabi. Have a FANTASTIC weekend!

Stamps: Stitched, Essence of Love, Itty Bitty Backgrounds,
Paper: Wild Wasabi, Afternoon Tea DSp, Whisper White, Glossy White
Ink: Wild Wasabi, Versamark
Accessories: Clear Embossing Powder, 1" Circle Punch, 1 1/4" Circle Punch, Preties Kit, Wild Wasabi Stitched Ribon, Hodge Podge Hardware, Brayer

Thursday, April 03, 2008

Rub-Ons


So the Ways to Use it Challenge today was to use Rub-ons. I figured for this card I would grab no stamps and just use the rub-ons. My favorite thing to do with them is to put them on buttons. This was a fun and fast card to make.

Stamps: None
Paper: Old Olive, More Mustard, whisper White, Really Rust
Ink: None
Accessories: Eastern Elegance Rub-Ons, Earth Elements Buttons, Scallop Circle Punch, Tool kit for Piercing

Wednesday, April 02, 2008

Lighthouse


I've gone and flipped the sketch again on today's Sketch Challenge. I am always running short of guy birthday cards. This will be great for my stash. I only used one color ink pad. I'm trying to simplify...of course I did not do that when I choose my sets. I just kept grabbing as the card progressed and then I realized I had just used 4 different sets. Let me know if you give this sketch a try!

Stamps: Winds of Grace, Sanded Background, Print Pattern Background, It's Your Birthday
Paper: Always Artichoke, Mellow Moss, Bravo Burgundy
Ink: Always Artichoke
Accessories: Jumbo Eylets, Circle punches-3/4", 1", 1 1/4", Tool kit for piercing

Tuesday, April 01, 2008

Fall Colors


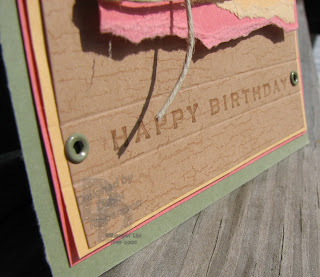
So today with the color challenge she threw four colors at us instead of the usual 3. The colors today were: Mellow Moss, Cameo Coral, Apricot Appeal, and Creamy Caramel. As I was scanning my stamps trying to figure out what I was going to use my eyes stopped at my poor Lovely as a Tree sitting at the bottom of a stack. If it was on the bottom it means it has not been used in a very ling time. I thought it would be perfect for this color challenge. I colored the stamp with the markers to get it to be various colors. I then used my Aqua pen and re-inkers to add a little more color to the tree trunk. I struggled with what to do along the bottom as it just needed something. I decided just to put the sentiment and use the scorer to accent it. I added more eyelets within the HB bracket. A few more layers than I usually do but I figured they were necessary to pull this together. The Tree panel is popped up on Dimensionals.

Stamps: Weathered Background, Lovely as a Tree, It's Your Birthday
Paper: Mellow Moss, Cameo Coral, Apricot Appeal, Creamy Caramel, Very Vanilla
Ink: Mellow Moss, Cameo Coral, Apricot Appeal, Creamy Caramel,
Accessories: Crop-a-Dile, Hemp Twine, Ticket Corner Punch, Scorer
Related Posts with Thumbnails